Friday 30 August 2013

Oh What Fun We Had........Part 2!

Another coat of paint is done and I think I will get away with one more coat - fingers crossed!  It is a bit of a soul destroying part of the redecorating process as this recess and all my many coats of paint will not be seen once the wardrobes are moved back in!!!!  All my hard work hidden ;-(....anyway on to much nice things.......where was I.......


Oh yes here is me putting on my new pinny.  Please remind me chin down pose does not a flattering shot make!!!  Just focus on the lovely pinny ;-)

Here is my friend Deb who is a much better pinny model than me.


We took these before Tim put us to work.  And let me tell you he is a hard task master.  We were inking at a rate of knots - Distress Stain and manilla tags flying all over the place. I have to say I was and always have been a slow swisher of inks but I proved to be a super fast inky edger!!!  Then we played with the fab layering stencils I mentioned earlier to create fun textures on our tags.


Here are my tags as I start to embellish.  We had so many lovely embellishments to play with.  Tim kept his eye on everyone and explained all the products and techniques we used as he guided us all to our finished project.


Here is Deb hard at work.  We had a fab table of ladies to craft and chat with and it seems we came from all over to join in the Tim Holtz fun.  Most of us were from the Midlands but we also had a lady who flew in from Ireland and Emma who traveled up from London Town.  We had a lovely time chatting and crafting, crafting and chatting!

When it was time to pack away Tim went into Santa mode and we all received some wonderful and unexpected pressies.  I will show you those later ....what a tease I know!!!


Here is just a small portion of the mess I made!!!  Notice I didn't distress Tim one bit ;-)  Then it was time to pack away and pick up our shopping......oh and of course it was time to get a photo with our instructor and enabler for the day....... but I am going to save that for the final instalment as I have one more coat of paint to get on and then I can relax a bit knowing I can put all the paint paraphernalia away.......

See you shortly X

Oh What Fun We Had!!!!!

I am still feeling all warm and smiley after a fab day out with my friend Deb yesterday.  We had a wonderful time with Tim Holtz at his last workshop and I have to say considering that it was his 4th in two days he was fresh as a daisy.  But I digress let me start at the beginning.

It took us a little while to find the venue and after following Mrs Sat Nav for a £4 quarter of a mile stretch of the M6 toll road we finally arrived safely at the Windmill Village Hotel.  We had given ourselves plenty of time to relax and have some lunch and I am really glad we did as meeting so many lovely like minded crafters was definitely one of the things that made the day so fabulous.  I might not remember all the names of everyone I met for which I apologise.  I think I was in giddy mode the entire day.  Poor Deb had to travel with me driving too ;-)  We immediately got chatting to some lovely crafters as we arrived - I have forgotten names here for which I do apologise - I am hoping they pop by and say hi so I can rectify that.  We were all so excited it set the tone for the day.

I know from my blog that the crafting community are a caring sharing bunch but to have it confirmed so spectacularly by every one we met was truly heartwarming.  After lunch and lots of chatting where I met fellow bloggers Annie, Rita and Alison for real and I bumped into the lovely Suzanne (I hope I remembered your name  right Suzanne) in the queue for coffees who had travelled all the way from Sweden to meet the lovely Tim we finally queued up for our first peek into our crafting room for the next 4 hours.


Here is the view from where Deb and I sat.  The room was lovely and spacious though it did get very warm - all that feverish inking causes friction and you know that friction causes heat!!!!  mmmmmmm I suppose it could have been all the fun we had chatting whilst we created too!!!


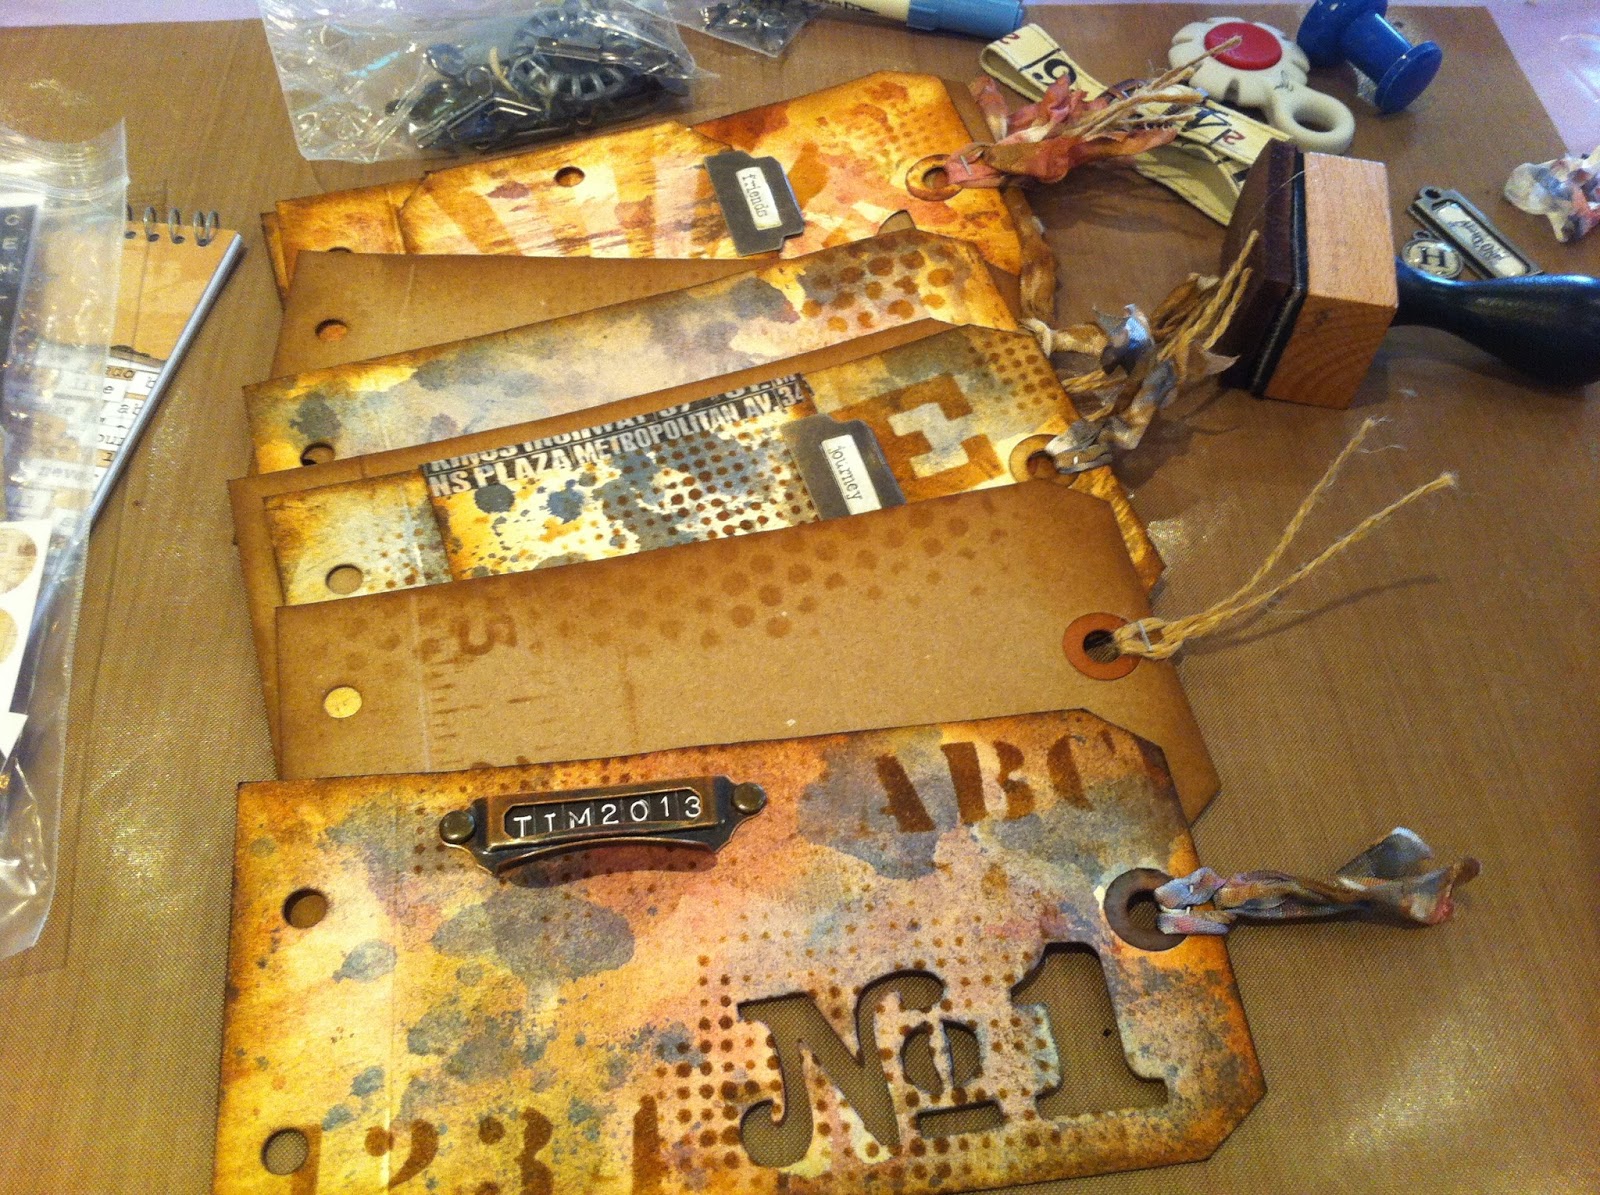
Here is my lovely stash just waiting to be played with.  I do love to see my own card class kits all set up ready for action but I can only marvel at the effort that must go into kitting out for Tim's workshop - A big thank you to Mario and his team - I will treasure my little wish bone charm dangling from the cutest little safety pin!!!


This is one of the pockets of my brand new pinny that I did not get any ink on whatsoever!!!  I may use some Distress Paint on it later to customise it as Tim taught us that Distress Paints are colour fast on fabric!!!!  Another reason to add more colours to my growing collection ;-)

We did a spot of shopping (it would be rude not to!!!).  and then it was time to begin.  I am pretty sure most of us stifled a slight frenzied scream as the class began ha ha!!


I know, I know it is a bit far away.  I didn't like to zoom in on my iphone as I know it goes a bit blurry if I am not careful.  I was already a fan of Tim's work and all the lovely products he tempts us with and it was a treat to see his enthusiasm and creativity in the real world.  Even at the end of a two day 4 workshop event he had time and a smile for everyone (more of that later!!)  Back to the class.  We had great fun creating a tag book and I have to say my latest must collect them all fad is Tim's new layering stencils - I got to take my first one home and had fun playing with lots of different ones whilst inking up my tags.  I know they are going to be so popular.  They are scaled down designs so they are perfect for creating layers on tags or cards - well on anything really.............and did I mention they are Tag shaped???? SOLD ;-)

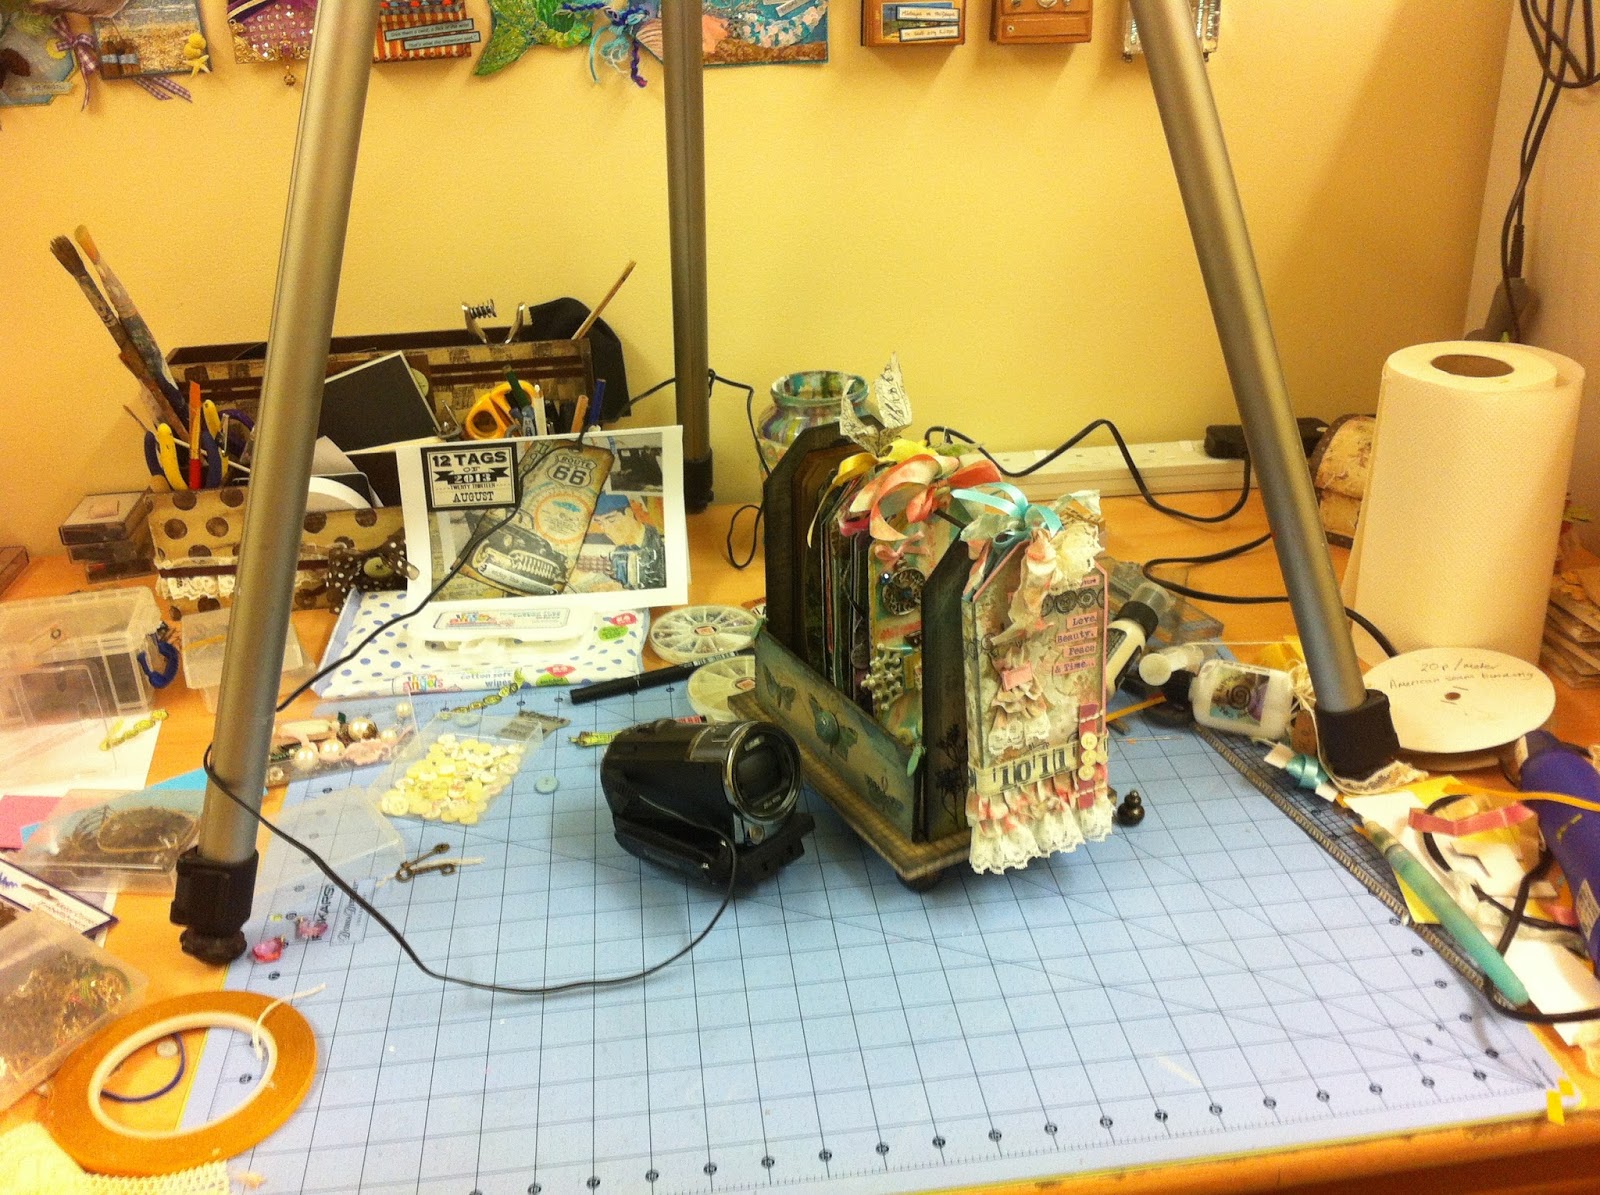
I think I have to take a break there as I need to get the final coat on the woodwork so watch this space and in the words of Arnie.....'I'll be back!!!'

Be sure to pop back again soon!!! x

Wednesday 28 August 2013

12 Tags of 2013 - August

I am off to meet Tim tomorrow so I thought I'd better make sure my homework was up to date!!!  Here is my version of Tim's August tag.

Tim ended up making 4 tags so you know me........any excuse to make more tags ;-)  It turned into a little booklet of tags.  Here is tag number 1....


I did not have the gorgeous travel stamps that Tim used but I did have a fab set of sewing ones from Creative Expressions.  I also don't own any Distress Markers so I improvised my colour stamping with clever manoeuvring of my Distress Ink pads!  Can you see my two tone cotton reels?  Here comes tag number 2........


I did make my usual video of how I got from Tim's inspiration to my interpretation but I will have to post that when I get to edit it at the weekend.  I really loved adding the little skirts to the dress form images.  Tag number 3.....


I found some lovely velvet ric rac in my stash so this tag is very storable!  I love that this set of stamps has so many wonderful quotes which were perfect to use on my tags.  And last but not least - Tag number 4........


Tag number 4 is actually the back cover of what turned into a little book of sewing tags - Hope Tim doesn't mind all this girly stuff!!!!  I loved making this cute little cotton reels and colouring them with the Distress Inks I used for the tags.


This final shot shows how the tags go together to form a little booklet of tags.  Don't forget to pop back for the video if you want to know what I did.  For more Tim inspired tags please follow this link although Tim won't be there as he is visiting with us here in the UK - I am so excited to be doing a class with the man himself tomorrow afternoon.  I will be sure to thank him for all the inspiration.


One of the jobs on my list for today is tidying up the mayhem created by making four tags yesterday and I have a small adjustment to make on the cover tag as I have attached the lacy pom pom a little too close to the hole and I can't quite thread it on to my tag storage (workshop available for sale from my blog or ETSY shop).

Thank you for popping by x

WOYWW 221

Very early good morning to you all - It is 3.22 am here and I am up and about and very glad you can't see me right now!!!  My eldest is flying back to Gibraltar today and I am seeing him off.  His Dad is dropping him off.  Whilst I am waiting for them to get dressed I thought I would make myself useful.  I hope I am awake enough to make a sensible post.

My first photo is off the mayhem making a Tim Holtz tag creates on my desk!!!  As you can see I had lots of fun yesterday.


I will be working on editing the video today though I will post the tag anyway as I am off to see the man himself tomorrow - almost as exciting as going to see the Osmonds!!!!  Giving my age away now ;-)


Here is a sneek peak of my August tag and like Tim I have made 4 tags - no wonder it took me so long!!!  A real tag work out.  I will post the photos of all 4 tags later today.  It turned into a mini book of tags.  You can see Tim's August tag in the background.  The technique was all about masking and stamping.

I am a bit sad now as I have just waived Damian off but only a bit as he is back at the end of September to start a new job - much closer to home than Spain and Gibraltar!!!

I am off to bed for a while as I definitely need more beauty sleep and will pop in and do my desk hopping after my breakfast.  If you want to join in a fab desk hop where you get to see what is on crafting desks around the world and to meet lots of fab crafting folk then follow this link to Julia's to find all the links you need to set off on a fascinating journey.

Night Night and see you soon.  Thank you for popping by x

Tuesday 27 August 2013

Work In Progress

Hi everyone, its a lovely sunny day again today.  It was fab yesterday too.  Unusual for a bank holiday in the UK ;-) I am going to balance my day with more painting in Callum's Room (my MIL is coming on Friday!), my Tim August tag video and sitting in the sun - I think I need a timetable!!

Here is the mural a little further on.


I hope this is recognisable as New York!  The lights are now on.  I have been putting off tackling the face of the girl as I don't want to mess it up!!!


Today I will white out the final two little murals I painted!  Boo Hoo!  Another 5 coats of white but first a removal job for the boys to get this wardrobe out of the alcove - I expect a lot of cobwebs to be revealed!!!


So long Dexter - you have been hanging around long enough ;-)  Is that DeeDee coming out of the closet - sorry couldn't resist that one ;-)


....and my other job today is to finish off my August tag video.  Had to have a break in proceedings to upload the content of my memory card to my computer.

Hope you are having fun in the sun and in your craft room too!

Thanks for popping by X

Friday 23 August 2013

Art Journalling Video

Today I was up with the lark - not sure why but I think it had a bit to do with not looking at the clock properly!!!  I thought it said twenty to eight and I was up and dressed by just after 7!!!!  I think I will put my glasses on in future ;-)

Still I feel I have got a fair bit done so far today and it is only 1 o'clock.  I have had my breakfast and was deadheading and pruning in the garden by eight!  The birds were singing and the sun was shining!  4 bucket loads of trimming later I came in to do some admin on my computer.

I have been surfing the net for things for Callum's room.  The wall paper is ordered and I have stocked up on printer ink.  I then decided to use Pinterest to collect ideas for bits and pieces for Callum's room  I found a really fab duvet cover but it is in America!!!  I am going to check out how much it would cost to deliver to the UK as I do love it but I have found a couple of alternatives if not ;-)  Gotta be careful of that - Note to self: make sure you browse UK shops ;-)

I am going to post my latest video before I  get some lunch.  I have wanted to set up and film an Art Journal page for some time.  I have only done 5 or 6 pages so far so although I did my first page in 2011. I am still a newbie really.  Here is my finished page.


If you follow my blog you will know I have made several mermaid tags in the past and if you were wondering how I achieve the effect this is the video for you.  I love editing these fast forward videos as I don't have to do much talking to myself.  Saying that I did manage about 10 takes on the intro before I was happy with it.

If anyone pops by who makes videos I would really like to know how you manage to shoot videos from your own view point rather than from across the desk as I do currently.  I think it would work best for this kind of video in particular but I have no idea how to set up my camera.

I also am led to believe you can rotate your film like you can rotate photographs - I may do a search on that before I eat.  All help gratefully received with that little conundrum!


Hope you enjoy my video.....I had great fun getting all my paints out.  I want to try some different styles of Art Journalling.  This one uses paint and decoupage but I think I would like to try an inky stamping one next.

See you soon.  Thank you for popping by x

Wednesday 21 August 2013

Mural Update...

Making slow progress as life keeps interrupting but I am making progress.  Here is the mural so far.


If you recognise the skyline you may guess the theme Callum wants for his room!  I am just taking a break from painting the mist as I am rubbing off more paint than I am putting on!!!

My design is constantly changing as I get each stage finished.  I am thinking of painting the ....ooops......almost gave it away......that is for the next photo!!!!

I thought I would post this then go and have a coffee break ;-)

Thank you for popping by x

WOYWW 220

Hi everyone.  I hope all is well in WOYWW land.  I have been missing for a while and just wanted to treat myself to a little crafting company today.  I am looking forward to catching up with you all.

So what is new on my desks???????  Over at the Video desk all is fairly neat and tidy........


I am working on a series of Graphic 45 Tag videos inspired by my latest workshop for my Tag Storage Unit.  You can see the one I made in the tutorial here and it is destined to have a family history of tags stored in it but at the moment it is housing G45 tags from packs of embellishments!!!  Don't count them ;-)


I am going to make a series of tag tutorials featuring all the beautiful collections of Graphic 45 papers (That's the plan anyway!!!).  As you can see I am going to use the packaging!  It would be rude not to when they make them look so pretty.  I was going for a Chinese lacquered look on this side of the tag.


And a totally different feel to the reverse of the tag.  I hope this series of tutorials shows off the beauty and versatility of Graphic 45 papers.  It will turn into a neat record of all the paper collections as they are released.  I think you could apply this idea to other paper manufacturers too.

Over on the neat end of my main desk is something I did at our Crop weekend before last.  Everyone there had Project Life fever and I do like the idea but I love my 12 x 12 layouts too much to give them up.  I thought I would try it out though and have started a pocket page using my latest buy which was the gorgeous My Minds Eye Chalk Board collection.  I fell in love with this collection when it was launched and lucky me my pal Jackie has it in her shop!!!!


I had great fun mixing and matching the papers to fit in the pockets.  I am going to print my photos in Black and White and then embellish a bit more.  I will make a 12 x 12 companion page so I get the best of both worlds.

That's it from me except to say if you don't know what WOYWW is then follow this link and be prepared to be amazed at the creativity going on all around the world.  I am off to virtual visit now.  Hope to see you there.

Thanks for popping by X

Tuesday 20 August 2013

New Layout Video Tutorial

I worked on the voiceover for this tutorial today and it has only taken a couple of hours to finalise and upload it to You Tube.  Actually less time than I thought it might as all the kids are off school so I am pretty sure the internet is in demand right now!

This tutorial looks at a way to make the most of great double-sided scrapbook papers.  There is also a fun way to make faux enamel brads.  It looked so realistic when I had finished that I forgot until I did the voice over that I had faked the brads as I didn't have enough in my stash!


I also show you how to make a pocket for a tag to add more photos and journaling to a layout.  I am using three papers from the fab Bo Bunny Anthem collection but you could use any coordinating papers from your collection to make a similar layout.


I hope you like this layout and try out the techniques for yourself.  Don't forget to subscribe to my You Tube Channel to be the first to hear when I upload my next tutorial.

Is it time for tea?  My tummy is rumbling !!!!!

Thank you for popping by.  See you soon X

Tag Tuesday - Windows, Gates, Doors and Portals

I suddenly remembered yesterday was Monday and I hadn't finished my tag for this week so the painting of murals took a back burner whilst I finished off my tag.  I went with door as my inspiration as you can see......


This is the door to the most important place in the world......HOME!  I had to include a wreath as I love them.  I love seeing the many fabulous ideas for door wreaths you can find on Pinterest and it is always on my list to make seasonal wreaths for my front door.  I have Halloween covered (follow this link for a fright!) and at Christmas I always make something with fresh greenery but that is it so far!


I also found this cute phrase on Pinterest so it was perfect for my Shabby Chic house.  Using up some snippets of Graphic 45 Little Darlings to make pretty bunting and that was it so here I am posting early for a change!!!!

It looks like it is going to be another nice day again here today.  I have mural painting to catch up on though I feel a video coming on too!!!!  Maybe I can craft whilst my mural is drying!!!  Busy day for me today then ;-)

If you, like me, love making tags then follow this link to see more tag art inspired by this weeks theme.  Please sign up to follow me if you like my blog and don't forget to email me if you do and I will send you the link to my free thank you tutorial.  

Wishing you a great day full of creativity.  Thank you for popping by X

Monday 19 August 2013

Room Update!

Yesterday I shared a couple of before photos of my son's room and today I am sharing a couple of during.  I think this make over is going to take a while as my murals are taking a few coats of paint to cover them up!!!


Here is Scully......I don't think he realises what is going to happen!!!  It is going to hurt me more than him.........


Here he is looking a ghost of his former self!!!!!  A few more coats of white will polish him off today....poor Scully.


To console myself I started painting a mural on the chimney breast as you can see here.  I am hoping to achieve the look of pop art combined with vintage comic.  I will post more photos later so you can see if I achieve what is in my head.  The pressure is on as I really don't want to paint another 5 coats of white to wipe it out if I get it wrong ;-)

If you make a mistake on paper you just get another piece - walls aren't quite that simple!  The two alcoves are almost ready for my Husband and Eldest son to build floating shelves into.  But I have to get out of the way first so it is more mural painting for me today.  Smiley face for me!!!!!!!

I had a quick look at some of my Pinterest activity on my way to writing this post....as you do!  Pinterest is addictive as one thing leads to another...I know you know what I am talking about!!!

My friend Jenny had been visiting some of my boards (Pinterest lets you know who has been visiting) and I popped over to her boards to see what she had been up to (only polite I think!) and in amongst her Ink board pins I followed a link to Karen Walker Inks an artist using alcohol inks and thought you might like to see some of her amazing work.  She takes alcohol inks to a whole new level.  I loved this video so I am sharing that link too.  I am going to give it a try as I think her techniques would be fab for cards and tags.

That's it from me as I have a date with a rather large paint brush that has my name on it!  See you tomorrow.  Thank you for popping by X

Sunday 18 August 2013

Crafting on a larger scale!!!

I hope you are all enjoying a wonderful weekend.  The summer holiday is slipping by fast and I promised to redecorate my sons room - It is long overdue and he has been very patient but he is a very grown up 14 year old and I don't think Scully from Monsters Inc cuts it anymore!!!


Wow has it been that long????  Worm farms and no flatscreen!!!!  I decorated this room in 2006 when Callum was 7 that is when this photo was taken.  Although Scully still lounges in this corner furniture and fittings have been altered as Callum has grown.

Actually looking at these two photos again I realised the two framed disney pictures were actually painted by me about 25 years ago when my eldest was small (he is a 6 ft 30 year old now!!!)  These were hung on his wall in the days when we were in Army housing and were not allowed to paint murals on the magnolia walls!!!!!  It is time to pack them up and put them in the attic ready for the grandchildren!!!! ;-)


All the teddies have been evicted and now it is time to paper over Scooby too!  Over the past couple of days I have been painting away and Picachoo is no more......well I think one more coat of white will just about wipe him away!

It is quite hard to paint over my artwork but we have plans for something else we can create together.  Last time I painted this room Callum had a go with the paint roller.  This time he has firm ideas of how he wants his room to look and we are getting creative together.

So that is my Sunday (and a few more days too!) taken care of.  I will share some more photos tomorrow.  I know it is not tag sized creativity but we are having fun getting creative on a larger scale.

Thank you for popping by x

Sunday 11 August 2013

Tag Tuesday - Wedding

I have been missing in action for a few weeks - I think the weather had a lot to do with my lack of tags although I was also very busy getting my new workshop finished and up for sale.  I had great fun designing The Tag Storage Project and I hope that lots of tag artists out there want to make one of their own - keep your fingers crossed for me.

I go to a fab crop every month where we chat and laugh and fit in the odd bit of crafting.  We have a lovely time this weekend and I caught up with a couple of tags too!!  I am not divulging how much cake, cookies and chocolate I ate but I didn't get any on my wedding tag as you can see!  There is an art to that I am sure ;-)


Weddings make me think of all those wonderful laces and satins we see on gorgeous wedding dress creations and that is what inspired me.  I have used a gorgeous cotton lace which I cut into and made frilly trims for my tag.  I wove two cream satin ribbons for the background of my tag and then stitched on pretty pearl buttons - this one is definitely all about the girl in the wedding!!!  I made a mini bouquet from some more ruched up lace and ribbons and I found a prima flower with a touch of blue which gave me the perfect quote for my wedding tag.  I love it when one thing leads to another!!


Here is a close up of all those lovely trimmings.  I need to check out what next weeks (in two days time) prompt is to see if I can be on time with my Tag Tuesday post for a change!  If you love tags then follow this link to see more wedding inspired tags.

If you are looking for tag storage check out this link.  If you are just popping by....... it is great to see you X

Tuesday 6 August 2013

Bo Bunny Gabrielle Layout

The sun is trying to peep from behind the clouds so it looks like it might be a nice day today (touch wood).  Here is the Scrapbook video tutorial I promised yesterday.  My computer was busy uploading all day yesterday.  The person that invents the super quick upload will make millions!!!!  Wish I had the the technical know how to tackle that one ;-)


This layout is all about ways to show of beautiful scrapbook papers.  There are many papers out there like this butterfly one that have gorgeous images on that tend to be covered up when we start to add photos and journalling.  I wanted to make the most of these two papers from the Bo Bunny Gabrielle collection.


So here are some tips for you to think about when using papers with large and beautiful images on them.  When you think about where you are going to place your photos if they overlap the images then think about cutting around the edge of the image and tucking your photo or photos behind.


Create a pocket behind your photograph so you can add a tag for your journalling.  This takes up less room on your paper and therefore shows off more of the design.

If you have chosen to frame one scrapbook paper with another then think about creating areas where you can see more of the pretty paper that may be underneath.  I have made these corseted areas.  You could also roll or fold back corners of the top paper to reveal more of the paper beneath.

I really loved how this layout turned out and I am going to mount it on a canvas as I have decided it is the start of a set of layouts of my parents and my husbands parents when they were children.  This one is of my Mum when she was 7.  I have tucked the original photo safely away in the journalling tag another thing I show you how to make on the tutorial.

This video tutorial will show you how I made this layout including all the tricks I employed to make the most of two fabulous papers.


Happy Scrappin' and thank you for popping by X

Monday 5 August 2013

On Safari with Bo Bunny Zoology


Take one round papermache box and some fab Bo Bunny Zoology papers and this is what I came up with!  One cute safari hut which tuned out to be the perfect place to keep our photos of a wonderful day visiting the Animal Kingdom park in Disney World.


I made a circular mini mixing and matching all the fun animal prints and stickers in the collection.   I think that the paper packs we treat ourselves to (every now and then!!!) are perfect for mini albums like these as they already coordinate so you can concentrate on the elements that make your project fun.


I turned the lid of the box into a straw roof and it took a while!!  I love the effect though - well worth the time spent next to the guillotine covered in multi medium!


I added lots of little hiding places for photographs and journaling.  Inside the lid made a perfect frame.  Here is Callum making friends!


Each of the pages of the mini has a large photo on one side and a pocket to tuck more photographs with journalling so I was able to really document a fun packed and magical family outing.


I will always remember the happy time we had.  Here is Callum High Fiving with a huge Bunny!!!!  I know that Callum will love this memento of our trip and will have fun showing it to his children one day.

Wishing you all a creative week - I am prepping for my class on Friday this week - I have a gorgeous set of stamps from Creative Expressions to play with.

Look out for another scrapbook tutorial (probably tomorrow) on my You Tube Channel which is uploading as I post this.  Don't forget if you like my blog or You Tube Channel I have a fun tutorial to give away to anyone that subscribes already or if you are a new subscriber.  Just drop me an email to let me know as I would like to thank you for joining me on my creative journey(email link on my right hand sidebar).

Thanks for popping by X

Friday 2 August 2013

BoBunny Anthem Card

Here is a fun card tutorial that can be adapted for any striped double-sided papers you may have.  I am using the gorgeous BoBunny Anthem Papers.


This design works best with a broader striped paper that has a definite pattern on the reverse as this gorgeous paper does here.  I love the dimension created by rolling back alternate stripes.


I am going to try this on a scrapbook layout - Watch this space!!!  Hope you enjoy the tutorial.  


Wishing you a fun week.  Thank you for popping by x
Related Posts Plugin for WordPress, Blogger...